Monday, November 30, 2020

Super Smash Bros. Fighters – The Legend of Zelda Series – 03 Zelda

Super Smash Bros. Fighters – The Legend of Zelda series – 03 Zelda 

Debut

In the Legend of Zelda series: The Legend of Zelda (1986)
In the Super Smash Bros. series: Super Smash Bros. Melee (2001)

Boxing Ring Title: Hyrule’s Wise Princess

Theme Song: Ballad of the Goddess/Ghirahim’s Theme

Princess Zelda is a major character in "The Legend of Zelda" series, and is the wielder of the Triforce of Wisdom. There have been various incarnations of Zelda throughout the series, but only three Zeldas have entered Super Smash Bros.: Ocarina of Time Zelda in Super Smash Bros. Melee, Twilight Princess Zelda in "Super Smash Bros. Brawl" and "Super Smash Bros. for Nintendo 3DS & Wii U,” and “A Link Between Worlds” Zelda in “Super Smash Bros. Ultimate.”

In “The Legend of Zelda: Ocarina of Time,” a young Zelda has been having bad dreams involving a man named Ganondorf, who hails from the Gerudo desert who pledges loyalty to her father, bringing her kingdom to ruins. Zelda plotted with Link to expose Ganondorf’s wickedness to her father, but unfortunately, Ganondorf was one step ahead and manages to slay her father, forcing her to flee with her aide, Impa.

During her time in hiding, she would learn the way of the Sheikah Clan from Impa and use her magic to create an alter-ego she calls “Sheik” so that Ganondorf wouldn’t be able to find her. Seven years later, Zelda - as Sheik - would find Link in the Temple of Time, and would proceed to help and guide him to the seven sages.

In “The Legend of Zelda: Twilight Princess,” which takes place 100 years after the events of “Ocarina of Time” in the Child Timeline, Zelda is about to have her coronation ceremony. However, it gets interrupted when Zant, the King of Twilight, invades her kingdom. She tries to force Zant's army out, but they prove to be too much for her army to handle. To stop the bloodshed, she surrenders, allowing Zant to spread his veil of Twilight over her castle. She ends up becoming a prisoner in her own room. 

Some time later, an imp named Midna would lead Link - who's stuck in a wolf form - to Zelda's room, where Zelda explains to Link what's happening. Much later on in the game, she helps save a dying Midna, and even assist Link in his battle against Ganondorf.

In “The Legend of Zelda: A Link Between Worlds,” which takes place 100+ years after the events of “Ocarina of Time” in an alternate timeline called the Downfall Timeline, Zelda is the sole ruler of Hyrule. After Link comes to warn her of impending danger, she tells him to warn Sahasrahla of Karariko Village, and gives him a special pendant. Later on in the game, Yuga – the main antagonist – barges into her castle and turns Zelda into a painting. He plans on using her, as well as the other six sages, to revive Ganon so he can fuse with him.

In Super Smash Bros., Zelda has a variety of magical spells she can use to give her an edge over her opponents!

Special Moves 

Neutral Special: Nayru’s Love 

Zelda surrounds herself in a magical barrier with sharp crystals swarming the sides. The sharp crystals damage anyone in who tries to approach while the barrier reflects projectiles back at the offender.

Inspired by the item, Nayru’s Love, in “The Legend of Zelda: Ocarina of Time.” In that game, using it would form a protective barrier around Link that would shield him for damage for a minute. The catch is that it would drain about a half of his magic - or a fourth if his magic is fully upgraded - as well as prevent him from using other items that require magic. It had no offensive purposes.

Zelda has never been shown using this move, though in "Hyrule Warriors," one of her attacks when she's wielding the Rapier seems to reference Nayru's Love.

Side Special: Din’s Fire

Zelda sends out a small ball of flame in front of her that can be guided up or down. After reaching a certain distance – or if you let go of the Special Button – Zelda will have the ball of fire explode. The farther the fireball goes, the more damage it’ll do when it explodes.

If Zelda is attacked while using this move, the fireball will continue to travel in whatever arc Zelda last had it going, and will travel the maximum distance before exploding.

Inspired by the item, Din’s Fire, in “The Legend of Zelda: Ocarina of Time.” In that game, using it would allow Link to create an explosion of fire around him, which would allow him to damage any enemies nearby, as well as light torches.

Zelda has never been shown using this move, though in "Hyrule Warriors," one of her attacks when she's wielding the Rapier seems to reference Din's Fire.

Up Special: Farore’s Wind 

Zelda spins around before disappearing. Anyone close to her gets sent flying upwards. Zelda will then reappear in the direction you’re holding, the default being upwards if nothing is held. Anyone who is unfortunate enough to be where she'll reappear will take damage and go flying away.

Inspired by the item, Farore’s Wind, in “The Legend of Zelda: Ocarina of Time”. In that game, using it would allow Link to mark an area in a dungeon so he can return to it later on upon using the move a second time. It has no offensive purposes.

Zelda has never been shown using this move, though in "Hyrule Warriors," one of her attacks when she's wielding the Rapier seems to reference Farore's Wind. 

Down Special: Phantom Slash 

Zelda strikes a pose as a Phantom begins to assemble itself. Upon being fully assembled, the Phantom will stall for a bit before rushing forward to try and strike foes with its sword! It can even take some hits for Zelda as well, though if either it or Zelda are hit during the assembling part, it’ll immediately shatter.

Zelda can instantly order the Phantom to attack before the it's fully assembled by pressing the Special Button again at any point, but it will be weak and won’t travel as far. What kind of attack the Phantom uses depends on how  much armor it has assembled.

Additionally, if you press the Special Button just as its head assembles itself on the body, it’ll immediately rush forward without stalling.

Inspired by the Phantoms in “The Legend of Zelda: Phantom Hourglass,” as well as “The Legend of Zelda: Spirit Tracks.” In those games, Phantoms patrol certain temples, and if they happen to spot Link, they’d chase him down. Getting hit would send Link back to the entrance. In “Spirit Tracks,” Zelda – who’s spirit got separated from her body in that game – could possess empty/dazed Phantom Armor and help Link out, whether through distracting enemies, fighting, or carrying him over dangerous areas. 

Final Smash: Triforce of Wisdom

Zelda summons the Triforce of Wisdom. The Triforce of Wisdom then begins trying to inhale anyone nearby. Once it grabs an opponent, they'll get absorbed into the Triforce of Wisdom and take damaging as it shrinks. Once the Triforce of Wisdom is super-small, Zelda will shatter it, sending the opponent flying. Unless the opponent has 100+% damage. Then they’ll be instantly KOed.

The move seems to be inspired by how Zelda uses the Triforce of Wisdom to defeat Ganon in “The Legend of Zelda: Breath of the Wild.” It also has a similar inspiration in “The Legend of Zelda: Ocarina of Time,” where Zelda uses the Triforce of Wisdom to stun Ganon long enough for Link to defeat him.

The Triforce of Wisdom is an item that debuted in “The Legend of Zelda.” Throughout the game, Link goes around obtaining the various broken shards of it from various dungeons, and once he has all eight pieces, he would be allowed to enter Ganon's Lair. In various games, the Triforce of Wisdom is heavily associated with Princess Zelda.

Additional Notes

Back in their debut in “Super Smash Bros. Melee,” Zelda and Sheik shared the same character slot. You could switch between them by using their Down Special, “Transform,” which would cause Zelda to transform into Sheik, and vice-versa. By “Super Smash Bros. for Nintendo 3DS & Wii U,” Zelda and Sheik were given separate character slots, as well as new Down Specials, because the Nintendo 3DS version of the game couldn’t handle transforming characters very well.

While Zelda’s design in “Super Smash Bros. Ultimate” is mostly inspired by her appearance in “The Legend of Zelda: A Link Between Worlds,” it also takes inspiration from her appearance in the game's prequel, “The Legend of Zelda: A Link To The Past.“ One such example is her necklace, which "A Link Between Worlds" Zelda doesn't wear.


Monday, November 23, 2020

Super Smash Bros. Fighters – The Legend of Zelda series – 02 Shiek

Super Smash Bros. Fighters – The Legend of Zelda series – 02 Shiek 

Debut
In the Legend of Zelda series:
The Legend of Zelda: Ocarina of Time (1998)
In the Super Smash Bros. series: Super Smash Bros. Melee (2001)

Boxing Ring Title: The Elusive Sheikah

Theme Song: Ocarina of Time Medley

Sheik is an alter-ego of Princess Zelda that debuted in "The Legend of Zelda: Ocarina of Time."

Following Ganondorf killing the King of Hyrule, the young Princess and her trusted ward Impa flee the castle on horseback, during which Zelda tosses her Ocarina near Link so he can find it. Once they manage to get to a safe place, Impa would begin to teach Zelda the way of the Sheikah so that Zelda could hide her identity from Ganondorf and his minions. At some point during this time, Zelda would adopt the alias "Sheik." Additionally, at least a little bit before Link would reawaken at the Temple of Time, Sheik would rescue Ruto from being frozen in the Cursed Ice at Zora's Domain.

Seven years later, Sheik would arrive at the Temple of Time at the exact moment Link reawakens from his slumber. She introduces herself as the "Survivor of the Sheikah" and instructs Link to head to Kakariko Village to obtain the Hookshot so that he can enter the Forest Temple. After Link acquires it and makes his way to where the Forest Temple is, Sheik appears and teaches him the song "Minuet of Forest" so Link can quickly warp to the entrance of Forest Temple whenever he wants. Sheik later shows up at the entrance to the Fire Temple, this time teaching Link the song "Bolero of Fire."

At the Ice Caverns, Sheik informs Link what happened to the Zoras before teaching him the "Serenade of Water" song. After that, Sheik would wait near the Water Temple, and once Link defeats its boss, Morpha, Sheik would dive into the water and swim off elsewhere.

At Kakariko Village, the place has suddenly come under attack by a mysterious force. Link happens to meet up with Sheik, and together they end up getting attacked by the Evil Shadow Spirit: Bongo Bongo. Once they both recover from that embarrassing defeat, Sheik teaches Link the song "Nocturne of Shadow" so he can head to the Shadow Temple and defeat Bongo Bongo. However, as Link need to head to the past in order to open the entrance, Sheik also teaches him the "Prelude of Light" so that he can quickly warp to the Temple of Time to travel back seven years to open it up.

Later at the Spirit Temple, Sheik reveals she's been waiting for Link to appear and informs him he has to travel to the past yet again in order to explore it. Teaching him the song ""Requiem of Spirit," Sheik uses the desert winds to cover her as she flees.

When Link has rescued all Six Sages, Sheik congratulates Link on his efforts and begins to go into more depth on what happened to the Kingdom of Hyrule before revealing her true identity as Princess Zelda.

Following that, the Sheik persona would never show up again until "Hyrule Warriors" 16 years later, where Zelda uses the alias to hide from Cia's Forces. Sheik first shows up in the second Scenario "The Sheikah Tribesman," where she saves Link and Impa from some of the Dark Forces. She then assures the two that Zelda is alive and that they'll reunite with her at some point. After that, she joins their group, during which they later find Lana during their trip to help a nearby village.

During the Ocarina of Time story arc, Sheik and Impa head to that era to close the portal there. Impa grows increasingly suspicious of Sheik since she's never heard of her before, but Sheik tries to reassure her she's on her side. A nearby Fairy then rushes towards them and asks them for help, as the Goron Chief Darunia has gone mad when "Princess Zelda" approached him, causing him to kidnap Princess Ruto. When they manage to knock some sense back into him and rescue Princess Ruto, they head to Zora's Domain where "Zelda" is. Through a series of events, they manage to reveal that the "Princess Zelda" is actually Wizzro in disguise. When Wizzro wonders how they saw through it, Sheik reveals her true identity as Princess Zelda, after which Wizzro flees.

In Super Smash Bros., Sheik uses a variety of tools and moves to help her rush in and do damage! Master these moves, and maybe you too can be a Sheikah Warrior.

Special Moves 

Neutral Special: Needle Storm 

Pressing the Special Button has Sheik begin stocking up on needles. She can stock up to about six. You can cancel this while keeping your current stock of needles at any time by shielding, moving left/right, or jumping.

As long as she has one needle, pressing the Special Button again will have her fling her needles dead ahead at lightning speeds!

In the air, Sheik throws them in a more downward diagonal direction.

You can tell how much Needles she’s stocked up on based on how much many needles she’s holding in her left hand.

Here’s a comparison where Sheik hasn't stocked up on any needles.

This move is original to Super Smash Bros. 

Side Special: Burst Grenade 

Sheik throws a Grenade – attached to a long string – in front of her. The Grenade by itself doesn’t do damage. Releasing the Special Button will have Sheik pull the string, causing the Grenade to begin sucking in anyone nearby before exploding a second later.

Should Sheik get attacked after launching the Grenade but before detonating it, she can go over and pick the Grenade up and toss it at her foes! It won’t blow up, though. Her foes can also do the same, so be careful!

This move is original to Super Smash Bros. 

Up Special: Vanish 

Sheik prepares herself for a second before an explosion occurs where she is and vanishes. The explosion damages nearby opponents. Depending on the direction you’re holding, Sheik will reappear a certain distance away from where she was, the default being upwards is nothing is held. Her reappearing will also damage opponents, but not as much as the explosion. 

Inspired by how she tends to “vanish” whenever she’s done talking to Link in "The legend of Zelda: Ocarina of Time." In those cases, she uses a Deku Nut by throwing it on the ground to cause a blinding flash, allowing her to escape. 

Down Special: Bouncing Fish 

Sheik leaps forward with an arc kick. If she manages to land the hit, the opponent will get sent flying and Sheik will rebound at a high arc. If she DOESN’T land the hit, then she leaves herself open for a counter attack, so be careful!

This move is original to Super Smash Bros. 

Final Smash: Sheikah Dance 

Sheik pulls out her dagger and rushes forward. If she hits someone, the screen darkens as the Sheikah Symbol appears for a second. Sheik then begins barraging her foe with punches, kicks, and her dagger. For the final hit, she uses her dagger to send her opponent flying in the opposite direction she was going.

This move is original to Super Smash Bros., though the Dagger she uses looks like a smaller version of the Eightfold Longblade from “The Legend of Zelda: Breath of the Wild.”

Additional Notes

Back in their debut in “Super Smash Bros. Melee,” Sheik and Zelda shared the same character slot. You could switch between them by using their Down Special, “Transform,” which would cause Sheik to transform into Zelda, and vice-versa. By “Super Smash Bros. for Nintendo 3DS & Wii U,” Sheik and Zelda were given separate character slots, as well as new Down Specials, because the Nintendo 3DS version of the game couldn’t handle transforming characters very well.

Sheik’s appearance in “Super Smash Bros. Melee” is based on her appearance in “The Legend of Zelda: Ocarina of Time.“ Her appearance in “Super Smash Bros. Brawl” and “Super Smash Bros. for Nintendo 3DS & Wii U” is based on scrapped concept art for a possible appearance in “The Legend of Zelda: Twilight Princess.” (which Sakurai speculates was specifically created for her appearance in Brawl) Finally, her appearance in “Super Smash Bros. Ultimate” is based on the Stealth Armor Set Link can obtain in “The Legend of Zelda: Breath of the Wild.”

Sheik is actually Princess Zelda in disguise. Bet you didn’t know that, huh? It’s a secret to everyone, so don’t tell, okay?


Monday, November 16, 2020

Super Smash Bros. Fighters – The Legend of Zelda Series – 01 Link

Super Smash Bros. Fighters – The Legend of Zelda Series – 01 Link 

Debut
In the Legend of Zelda series:
The Legend of Zelda (1986)
In the Super Smash Bros. series: Super Smash Bros. 64 (1999)

Boxing Ring Title

Ocarina of Time Incarnation: Master of the Ocarina
Twilight Princess Incarnation: Hero of Hyrule
Breath of the Wild Incarnation: Champion of Hyrule

Theme Song: The Legend of Zelda Medley

Link is the main protagonist of the Legend of Zelda series, and the wielder of the.Triforce of Courage. There have been various incarnations of Link throughout the Zelda series, but so far only three Links – not counting Young Link and Toon Link – have entered Super Smash Bros. with the name and title of “Link”: “Ocarina of Time” Link in Super Smash Bros. 64 and Super Smash Bros. Melee, “Twilight Princess” Link in Super Smash Bros. Brawl and Super Smash Bros. for Nintendo 3DS & Wii U, and the “Breath of the Wild” Link in Super Smash Bros. Ultimate.

In " The Legend of Zelda: Ocarina of Time," a young Link lived peacefully in the Kokori Forest, but after disaster struck his home, Link would leave the Kokori Forest and journey to Hyrule Castle, where he would meet the young Princess Zelda. Learning that Zelda senses evil within the heart of a man named Ganondorf, Link would end up traveling across Hyrule to gather the 3 Gemstones to open the Temple of Time, obtain the Master Sword, and expose Ganondorf. When Link gained entrance to obtain the Master Sword, Link was considered too young to wield the it and was put to sleep, reawakening seven years later and ready to face his destiny.

In "The Legend of Zelda: Twilight Princess," which takes 100 years after the events of Ocarina of Time in the Child Timeline, a new Link was born and raised as a simple farm boy. Initially intending to make a trip to Hyrule Castle to offer a gift for Princess Zelda’s coronation ceremony, the children of the village he lives in end up getting kidnapped, including his close friend Ilia! Link rushed off to save them, only to get dragged into the realm of Twilight where he gets turned into a wolf. There, he would meet a small imp named Midna, and although both of them initially get on each other’s nerves, they slowly come to respect one another as they work together to save both the world of Hyrule and the world of Twilight from the demented king, Zant.

In "The Legend of Zelda: Breath of the Wild," 100 years before the events of the game, Link assisted Princess Zelda and her Four Champions in a war against the Demon King, Ganon. Link, however, was gravely wounded in battle. To save his life, he was placed in a hidden chamber so he could recover. 100 years later, Link reawakens with no memories of what happened, and sets off to discover his past and eventually reunite with Zelda to finally defeat Ganon once and for all!

While mostly a blank state so players can easily place themselves in the game, some Links have some notable personality traits that make them stand out amongst each other. Despite that, they all share one thing in common with each other: courage. Each and every Link is willing to risk his life to protect his friends and family. It's what keeps them going, no matter how daunting a task may be.

In Super Smash Bros., Link uses the Master Sword and Hylian Shield, as well as various tools he has found during his adventures, to fight against his opponents. Show your courage and face your challenges head on with Link!

Link is one of the twelve members of the “Perfect Attendance Crew”. Link is also one of the four faces of the game, Mario, Pikachu, and Kirby being the others.

Special Moves 

Neutral Special: Bow and Arrows 

Link fires an arrow from his bow. The distance and speed it travels depends on how much you charge it up.

If you missed your target, the arrow will stay put on the ground for a bit. You can have Link go over and pick the arrow up, and throw it at his opponent!

… Or, after picking the arrow up, you can use the move again to fire TWO arrows at once! Neat, huh? 

Inspired by the Bow and Arrow weapon that debuted in “The Legend of Zelda.” Link could use the move to attack foes from afar, though each shot caused Link to lose one Rupee. Starting in "The Legend of Zelda: A Link to the Past," Arrows would be given their own inventory slot.

The Bow takes its appearance from “The Legend of Zelda: Breath of the Wild," specifically the Traveler’s Bow. The ability to fire more then one arrow at once was also introduced in “The Legend of Zelda: Breath of the Wild,” though only certain bows had the ability to do so, and the Traveler's Bow was not one of them. 

Side Special: Boomerang 

Link tosses a Boomerang at his opponent. The distance it flies depends on whether or not you input the move like a Smash Attack. Link can also aim it upwards or downwards. If it hits someone, it comes flying back to Link. While it’s returning to Link, it’ll pass through any opponent and deal damage.

Link can actually avoid regrabbing the boomerang if he is too high up or too low from where he threw it. In those cases, he won’t be able to use the move again until the boomerang “disappears.”

Inspired by the the Boomerang weapon that debuted in “The Legend of Zelda.” In that game, Link could use it to defeat weak enemies, stun stronger ones and grab items from afar. The design here is based on “The Legend of Zelda: Breath of the Wild.” 

Up Special: Spin Attack 

Link begins spinning around super-fast with his sword extended to his side. When used in the air, Link will slowly rise upward while dragging his opponent(s) with him before delivering a final slash that sends them away.

On the ground, Link spins in place, flinging anyone nearby away from him. Link can also charge the ground version to do more damage and knockback. 

Inspired by the Spin Attack that debuted in “The Legend of Zelda: A Link to the Past.” The ability to rise in the air with it is original to Super Smash Bros., though in "Hyrule Warriors," one of Link's attacks involves him spinning around into the air.

Down Special: Remote Bomb 

Link pulls out a Remote Bomb. He can then throw it at his opponent or away from him.

After throwing the bomb, you can detonate it at any time by using the move again… as long as no one is holding the bomb, that is. Link can also get hurt by the explosion, so be careful!

The bomb will detonate by itself after 30 seconds pass, or if it gets hit by a fire move.

While Link always had Bombs as his one of his weapons throughout the “The Legend of Zelda” series, this version is based on the Remote Bomb that debuted in “The Legend of Zelda: Breath of the Wild,” where it behaves the same way as it does in Super Smash Bros. Additionally, Link had the option of using square-shaped bombs as well. 

Final Smash: Ancient Bow and Arrow

Link pulls out his Ancient Bow and Arrow and takes aim, firing one straight ahead of him! If the Ancient Arrow hits its target, it will explode, causing massive damage to the opponent and anyone nearby.

While Link always had Bows and Arrows as one of his weapons throughout the “The Legend of Zelda” series, this version is inspired by its appearance in “The Legend of Zelda: Breath of the Wild.” The Ancient Bow and Ancient Arrows are the best Bow and Arrows in the game respectively, and Link can find either of them by exploring, or by going to the Akkala Ancient Tech Lab to make them. The Ancient Bow is capable of flinging arrows super quick, while the Ancient Arrows can cause massive damage to the Guardian enemies, as well as defeat regular enemies in one hit.

Additional Notes 

Link, while either standing or ducking, can use his shield to block projectiles. That is, as long as he isn’t holding something else, like one of his bombs.

If Link is at 0% damage, he can fire a Sword Beam when doing his Forward-Smash Attack! The size, distance, and damage it deals depends on how long you charge it. It is not very strong, but it helps deal extra damage and can hit foes from afar! Once Link takes damage, he’ll either have to recover his health back to 0% by eating healing items – if available – or get KOed to use the Sword Beam again. 

Inspired by the Sword Beam attack which debuted in “The Legend of Zelda.” In nearly all of its appearances, Link can only use the Sword Beam attack if he’s at full health. 

Link also has his classic “green hat and tunic” as an alternate costume. This one is inspired by its appearance in “The Legend of Zelda: Breath of the Wild,” where it’s part of the “Hero of the Wilds" set. Link will obtain all three parts of this outfit upon clearing all 120 Shrines in the game.

Dark Link is also an alternate costume for Link. Dark Link is a mysterious doppelganger of Link who made his debut in “Zelda II: The Adventure of Link.” Throughout the series, his origins are unknown, though it’s often speculated that Ganondorf is responsible for his existence. His appearance here is somewhat based on the “Dark Clothes" set Link can get in “The Legend of Zelda: Breath of the Wild,” though in that game, the outfit is a recolor of “Hero of Time" set rather than the “Hero of the Wilds" set.


Monday, November 9, 2020

Super Smash Bros. Fighters – Donkey Kong Series – 03 King K. Rool

Super Smash Bros. Fighters – Donkey Kong Series – 03 King K. Rool 

Debut
In the Donkey Kong series:
Donkey Kong Country (1994)
In the Super Smash Bros. series: Super Smash Bros. Ultimate (2018)

Boxing Ring Title: The Kremling Commander

Theme Song: Gang-Plank Galleon

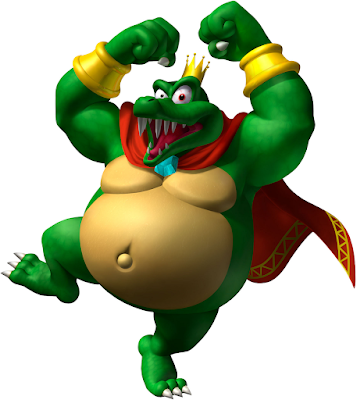
King K. Rool is the main antagonist in the Donkey Kong series. He is the leader of the Kremlings, and often tries to steal the Kong's Banana Hoard to starve the Kongs, as well as attempt to conquer Donkey Kong Island. He also has a fondness for adopting various aliases and disguises when pulling off his many schemes.

King K. Rool makes his debut in Donkey Kong Country. Prior to the events of the game, he and his Kremling Krew have attempted to steal the Banana Hoard from the Kongs many times, often to no avail. One night, the Kremlings are finally successful when Donkey Kong puts his little buddy, Diddy Kong, in charge of guarding the bananas as part of his "hero training." They manage to overwhelm the young monkey and haul the Banana Hoard back to K. Rool's ship: The Gangplank Galleon.

King K. Rool is fought at the end of the game at his ship, where he attacks them with cannonballs, charging at the duo, and throwing his crown. DK and Diddy manage to defeat him, after which the kredits roll... wait... "kredits?" That's right, King K. Rool uses a fake credits reel as a distraction, and once it ends, K. Rool gets back up to continue the fight! Despite his efforts, DK and Diddy manage to beat him again and reclaim the Banana Hoard.

In the Game Boy Advance remake of the game, after the real credits are done playing, he tosses Donkey Kong and his friends off of his ship and swears revenge, with Cranky Kong snarking that it sounds like a lame setup for a sequel. 

As you can guess, he returns in Donkey Kong Country 2: Diddy's Kong Quest. King K. Rool, now going under the alias "Kaptain K. Rool," and his Kremling Krew kidnap Donkey Kong while he was resting at the beach and transport him to their airship, The Flying Krock. He leaves a ransom note demanding that Kongs surrender the Banana Hoard to him before escorting DK to their home turf, Crocodile Island.

Inside The Flying Krock, Kaptain K. Rool beats up DK for a bit in front of Diddy and Dixie before turning his attention to them! The two manage to trounce him and celebrate, only for K. Rool to get back up and prepare a sneak attack! But before he can pull it off, DK breaks free from his bindings and sends K. Rool flying out of the ship and towards the sea, where the reptile ends up getting chomped on by some sharks until he manages to escape to Crocodile Island's Lost World.

Once Diddy and Dixie make it to the Lost World, Kaptain K. Rool engages the two in one last bout, which ends with him getting flung into the Krockodile Kore, which just so happens to be Crocodile Island's power source. As Crocodile Island sinks into the sea, a small raft is seen fleeing, with Kaptain K. Rool giving an ominous laugh.

King K. Rool has the same role in Game Boy Advance remake. However, as he escapes the sinking Crocodile Island on his raft, he begins to curse the Kongs for what they did. As he states he won't be stopped next time, Funky Kong drops a bomb on his raft, and K. Rool swears revenge.

King K. Rool then shows up in Donkey Kong Country 3: Dixie Kong's Tripe Trouble where he now goes under the alias "Baron K. Roolenstein." Prior to the events of the game, he and the Kremlings manage to seal away the Banana Queen behind an evil barrier and scatter her Banana Birds every where throughout the Northern Kremisphere. Eventually, DK and Diddy arrive to go fishing in region's lake, which results in them being captured. K. Roolenstein then tosses the two inside of his new robot, KAOS, to power it up, before having the robot act as the Kremling's "current leader" to fool the Kongs that he was removed from power.

In the level, "Kastle Kaos," Dixie and her baby cousin Kiddy manage to defeat the robot, after which they discover that K. Roolenstein is indeed the croc behind the machine. He then engages the two in battle with his new helicopter pack to keep him afloat, but the two manage to best him, freeing DK and Diddy from inside KAOS. K. Roolenstein then flees to Kremetoa, with Dixie and Kiddy giving chase. There, he engages them in one last bout inside the Knautilus, which results in him losing once again.

If the player manages to rescue the Banana Queen - which requires rescuing all 15 Banana Birds - then a short scene plays afterwards of her chasing K. Roolenstein down before dropping a giant egg on him as revenge for trapping her.

King K. Rool also shows up in Donkey Kong 64. Prior to the events of the game, K. Rool and his Kremling Krew manage to rebuild Crocodile Island as a technological fortress. Afterwards, K. Rool hires a man named Snide to help him build the Blast-O-Matic, a doomsday device that would be capable of destroying Donkey Kong Island with one blast! Once the machine was complete, King K. Rool fired Snide out of paranoia, then orders the Kritters to maneuver their base near Donkey Kong Island! Unfortunately, they end up crashing it into a rock, which badly damages the Blast-O-Matic. To buy them some time to repair it, K. Rool orders his minions to steal DK's Golden Bananas, as well as kidnap DK's friends.

Afterwards, K. Rool appears in certain cutscenes throughout the game, were he mostly comments on Donkey Kong and his friends's successes while chastising the Kremlings for their failures to stop the them. Once DK and his friends make it to Hideout Helm, the Kremlings manage to fix the Blast-O-Matic, with K. Rool ordering it to be fired immediately, regardless of the costs. Unfortunately for him, the Kongs manage to shut down the Blast-O-Matic. K. Rool tries to flee in an airship, only for K. Lumsy - a former member of the Kremling Krew, and possibly K. Rool's little brother - to backstab the crocodile king and crash the airship, allowing the Kongs to enter. Inside, they find that the ariship is shaped like a Boxing Arena. K Rool, now under his boxing alias "King Krusha K. Rool," challenges the heroes to a final battle.

King K. Rool also appears within the Donkey Kong Land trilogy. The first Donkey Kong Land serves as a direct followup to Donkey Kong Country, where Cranky calls up K. Rool and allows him to steal the Banana Hoard due a bet he made with DK and Diddy, saying that they wouldn't be able to reclaim them on the less-powerful Game Boy. Donkey Kong Land 2 has the same story as Donkey Kong Country 2: Diddy's Kong Quest. Donkey Kong Land III sees K. Rool entering a contest to find the legendary Lost World, and he sends his Kremling Krew - as well as a rebuilt KAOS - to stop Dixie and Kiddy from finding it. When KAOS is defeated, K. Rool confronts the two himself on two separate occasions, though ultimately he ends up losing the contest in the end.

King K. Rool also stars as the antagonist in the DK series. In DK: King of Swing, Donkey Kong and his pals are preparing to hold the Jungle Jam Tournament, where they will award various medals to the winners. The one who receives the most medals will be crowned the "Jungle Hero." Learning of this, King K. Rool arrives in his small hovercraft to steal all of the medals for himself, crowning himself the "Jungle Hero." After that, he flees with Donkey Kong pursuing him.

At the start of every world, K. Rool flies through the map while dropping some of the medals in the levels that DK will explore. K. Rool serves as the final boss in the game's fifth and final world, K. Kruizer III, in the level titled "King K. Rool." Here, the Kremling king challenges DK to a climbing race to the top. Once DK manages to beat him, K. Rool claims that it was just practice and battles DK. Despite his efforts, DK manages to best him again. King K. Rool's aircraft begins to blow up as DK escapes with all the medals.

K. Rool is also playable in the Jungle Jam Tournament Mode, serving as the largest and strongest of the playable characters. His partner for the tournament is Bubbles from the unrelated NES game, Clu Clu Land.

Also of note, this is the first game where King K. Rool isn't wearing the golden armor that covers his chest and stomach.

In DK: Jungle Climber, King K. Rool learns of the Crystal Bananas, which are being held by an alien named Xananab who's currently residing at Sun Sun Island. Hoping that their powers would help him conquer the universe, he and five Kritters head there and manage to steal the five Crystal Bananas. Their celebration is cut short when they spot Donkey Kong, Diddy, and Cranky approaching from afar, forcing them to quickly flee via a dimensional portal device called Spirowarp.

Throughout the game, King K. Rool is encountered in various islands and dimensions. He expresses his annoyance at DK, Diddy, Cranky, and Xananab pursuing him.before having one of his Kritters use the powers of the Crystal Banana to try and defeat the Kongs. Once Donkey Kong manages to reclaim the fourth Crystal Banana, King K. Rool flees to Planet Plantaen, home of Xananab and his people. Chased into a dead end, he decides to fight DK and Diddy by using various methods, such as charging at them, and using explosive spike balls, though he ends up being defeated.

Refusing to accept defeat, King K. Rool decides to use the power of the Crystal Banana himself, transforming into a giant! In his new form, he attacks the two primates with new moves, such as breathing fire, exploding mines, summoning meteors of varying sizes, and trying to crush the two with his hands! Ultimately, Donkey Kong and Diddy manage to best the Kremling King again, and he reverts back to normal. Once the Kongs return the Crystal Banana to Xananab, they use a Banana Spaceship to ehad back home, all while dragging the unconscious K. Rool with them.

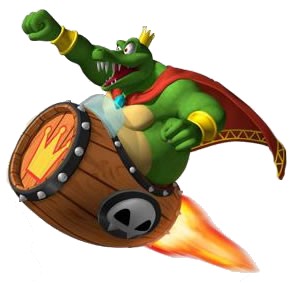
King K. Rool also shows up as a secret character in Donkey Kong: Barrel Blast, unlocked after completing "Challenge #31: Showdown Vs. King K. Rool" from Candy's Challenges. Compared to the other racers, who are wearing Rocketbarrel Packs, King K. Rool rides on top of a Rocketbarrel Vehicle. His Boost, Speed, and Agility are all ranked 4/5, tying him with his rival Cranky Kong as the second-best character in the game.

King K. Rool's only outing in the Super Mario series is in Mario Super Sluggers, where he sports an Egyptian theme. In the game's Story Mode, he resides in DK Jungle Stadium, where he tries to stop Mario, Donkey Kong, and their friends by sending four of his Kritters off to challenge them. Once they are defeated, he challenges them himself, only for his team to lose. Regardless, he's impressed by their skills, and decides to join them in their quest to stop Bowser.

King K. Rool can not be selected as a Baseball Captain. Instead, he serves as a Team Player. Of note is that he's on Donkey Kong's team by default. His justifications for doing so is because he was impressed by DK's skills at the game, and decided to call a truce. (at least when playing baseball, anyway.)

Personality-wise, true to what his name would imply, King K. Rool is a rather cruel individual, as he tends to treat his subject poorly, especially if they're doing badly. The mistreatment of his troops does tend to backfire on him now and then. In Donkey Kong Country 2: Diddy's Kong Quest, Klubba hopes that Diddy and Dixie will foil his plans, while in Donkey Kong 64, K. Lumsy is implied to have given him a massive beat-down for locking him up earlier. Despite all this, the Kremling Krew still loyally follow him. Of particular note is that K. Rool is said to respect Kalypso's leadership skills, while being somewhat terrified of Kludge's strength.

King K. Rool is also shown to be a dirty fighter, often feigning his defeats to try and catch his foes off-guard. He also seems to be a bit of a showboater, and he is seen constantly showing off and taunting the Kongs throughout his battle in Donkey Kong 64. His motivation for stealing the Kong's Banana Hoard is said to be because he wants to starve the Kongs, as well as the fact that his Kremling Krew really love the nutritional value of the bananas. While it was initially said that K. Rool also loves bananas, DK: Jungle Climber reveals he actually despises them.

In Super Smash Bros., King K. Rool is ready to cause some havoc: Kremling-style! He may be somewhat slow, but he makes up for it with his immense strength, as well as his various tools and gadgets to give himself the edge over his foes!

Special Moves 

Neutral Special: Blunderbluss

King K. Rool dons a Pirate hat and brings out the Blunderbluss, shooting out a kannonball. Anyone hit by the kannonball takes damage.

If you hold the Special button after firing the kannonball, K. Rool will begin trying to suck something or someone inside his Blunderbluss. If it catches something, K. Rool can then fire it either diagonally in front of him, diagonally behind him, or above him. Anyone who gets hit by the flung character will also take damage.

In certain occurrences, K. Rool can also suck up his own kannonball he shot and refire it in either of the stated directions mentioned up above as well.

Inspired by one of King K. Rool’s attacks in his boss fight in “Donkey Kong Country 2: Diddy’s Kong Quest,” where he’d use the Blunderbluss to fire Kannonballs – and even Spiked Kannonballs – at Diddy and Dixie. Ironically, the way to defeat K. Rool was to throw the Kannonballs back into his Blunderbluss, where it would cause the machine to explode. Looks like he worked out that bug.

Side Special: Crownerang

King K. Rool tosses his crown out in front of him, damaging anyone in front of him. True to the name, the Crownerang comes back to K. Rool after throwing it.

If, for some reason, the crown fails to return to K. Rool, it’ll land on the ground. He'll have to go and pick it up himself if he wants to use Crownerang again.

The opponent can also snag the crown and throw it back at King K. Rool to damage him! Be careful, either try and dodge it, or try and grab it as they toss it at you!

If the crown gets tossed offstage, it’ll teleport back to the stage somewhere. If no one picks up the crown in a certain amount of time, it’ll start to “disappear.” Once it does, it’ll return back on top of King K. Rool’s head.

Inspired by one of King K. Rool’s attacks in “Donkey Kong Country.” In that game however, Donkey Kong and Diddy Kong could not pick up the crown, though they could jump on the King’s now-exposed head to damage him. 

Up Special: Propellerpack 

King K. Rool puts on his Propellerpack and flies upward! K. Rool can go either forward or backwards during his ascent. The blades will damage and somewhat drag opponents up with K. Rool as well.

Inspired by his boss fight in “Donkey Kong Country 3: Dixie’s Double Trouble,” where he used the Propellerpack to mostly stay above Dixie and Kiddy during their battle. 

Down Special: Gut Check

King K. Rool puffs out his stomach. His Golden Armor plates begin glowing.

Any small-brained fool who DARES to attack him while his armor is glowing will get bounced away from him and take damage!

This move can also reflect projectiles. 

Seems to be inspired by several instances of Kremling resilience. In “Donkey Kong Country,” the golden armor on King K. Rool’s stomach makes him immune to frontal assaults. Some Kremling enemies can shrug off front attacks, and in some cases damage the Kongs. Another source of inspiration might be the Klump enemies in “Donkey Kong 64,” as they use a similar move when one of the Kongs approaches/bumps into them. 

Final Smash: Blast-o-Matic 

King K. Rool stomps his foot and charges forward at blinding speed! Anyone hit gets flung to DK Island. King K. Rool then enters his greatest invention, the Blast-o-Matic, and begins pounding the “FIRE” button over and over while laughing like a maniac as the laser begins to charge.

Once it’s fully charged, the laser fires, damaging not only the helpless opponents, but also destroying DK Island! (don’t worry, the island will get better!)

King K. Rool and his opponent(s) then get teleported back to the stage they were fighting on, with his opponent(s) getting flung away.

Inspired by the Game Over sequence of “Donkey Kong 64,” where, upon either quitting the game, losing all of your lives, or failing to destroy the Blast-o-Matic in time in the level “Hideout Helm,” the player would be treated to a scene of King K. Rool laughing in triumph as the Blast-o-Matic is now fully charged. With a press of a button, DK Island and everyone on it is doomed, although the game cuts away before the inevitable destruction takes place.

Additional Notes 

King K. Rool has a unique gimmick: Belly Super Armor! Belly Super Armor allows K. Rool to tank any hit to his stomach while performing certain moves, such as his Neutral-Ariel attack!

However, it can only block so much. As the Belly Armor takes more damage, cracks begin to form, and eventually it won’t be able to block another attack and will “shatter,” leaving King K. Rool open for attack.

His Belly Super Armor will slowly recover overtime, though. At it’s weakest, it takes about 47 seconds to fully recover. You don’t need to worry about the Belly Super Armor cracking when using Gut Check, though, as Gut Check prevents cracks from happening.

During the development of Donkey Kong Country, King K. Rool was intended to go under the name of either “Krudd” or “Kommander,” but both of these ideas were nixed. Gregg Mayles - character designer for Donkey Kong Country - would also reveal some early concept for the character. He certainly looks different, huh?

When asked what the “K” in King K. Rool’s name stands for, Gregg Mayles responded “Nothing! It was just a way of making him seem more important, that he’d added it to inflate his ego. In hindsight, it could have been something tonal like ‘Kremling’, or something deliberately out of character like Keith. What do you reckon it should stand for?